
Yesterday I went to the supermarket to buy a bottle of wine and, you know how it is, whenever you go to the supermarket to buy one thing you inevitably come back with things that you had forgotten you needed.
I bought: one bottle of wine, a six pack of yoghurt and some hard crunchy pears.
I came home and pulled out of my supermarket bag: one bottle of wine, a six pack of yoghurt, some crunchy hard pears.................and two ham and tomato stuffed baked potatoes.
Now, I didn't inadvertently drop them into my basket because a) I think I would have noticed cause they were hefty wee numbers(and I don't eat meat) and b) there was no evidence of them on my receipt.
So now I am wondering if I am now living in some sort of random reverse Bermuda Triangle.
And I'm almost tempted to go back to the supermarket today to see if it happens again.
|
|---|
Friday, October 30, 2009
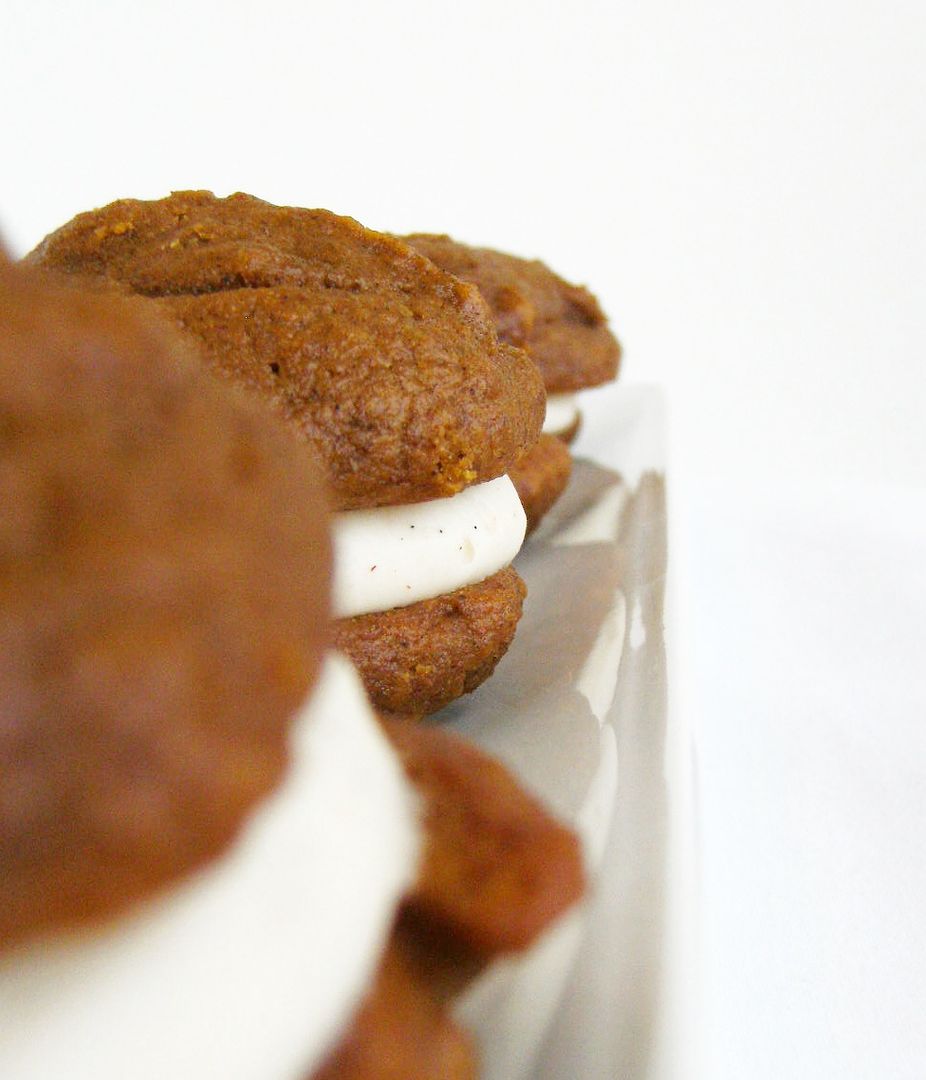
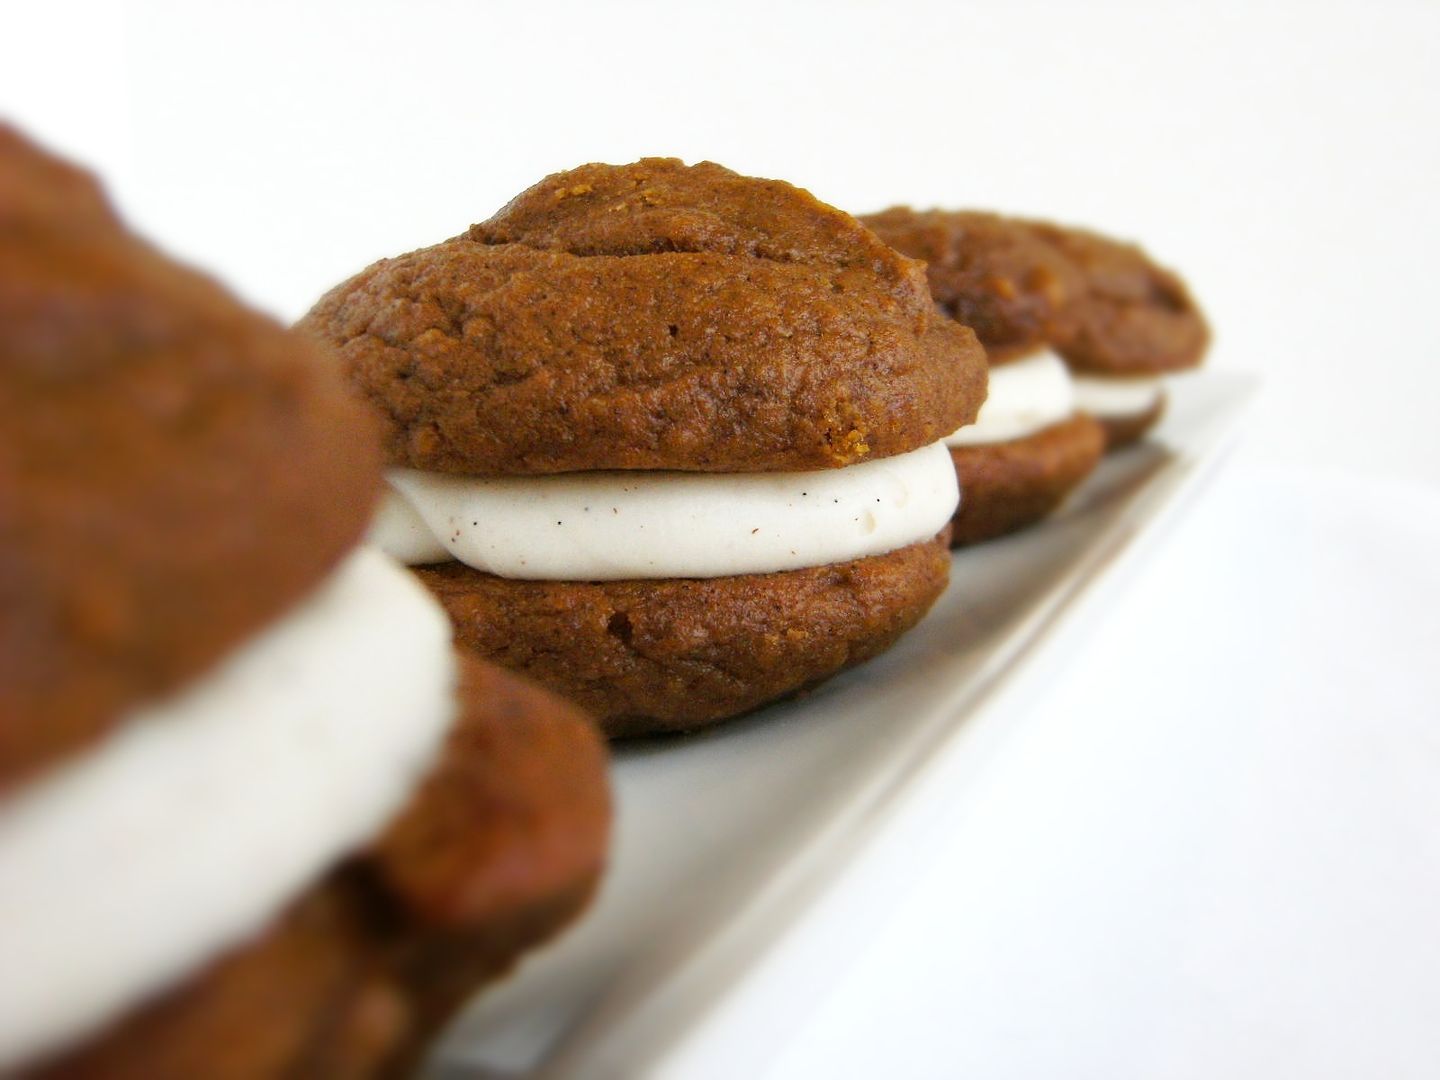
Flavor-of-the-Month. . . .Pumpkin Whoopie Pies


I decided to make something that's been on my "must make" list for a few years now...Pumpkin Whoopie Pies. Actually, Pumpkin Whoopie Pies with Vanilla Bean-Cinnamon Cream Cheese Filling. Oh, yeah.
Guys...my house smelled SO incredibly delicious when these babies were baking. I almost called my neighbor to come over and smell my house, but I thought I might come off as a little wacky. Sooooo, I called my sister and described the smell to her over the phone (she already knows I'm wacky).
My point is, even if you don't care for pumpkin, make these and just SMELL!

How do they taste? Ummm...delicious. Have you ever eaten a yummy Starbucks Pumpkin Cream Cheese Muffin? They are similar but 1,000 times better.
Here's the recipe:
Pumpkin Whoopie Pies
{adapted from Martha Stewart & Baked cookbook}
- 3 c all-purpose flour
- 1 teaspoon salt
- 1 teaspoon baking powder
- 1 teaspoon baking soda
- 2 tablespoons ground cinnamon
- 1 tablespoon ground ginger
- 1 tablespoon ground cloves
- 2 c packed dark-brown sugar
- 1 c vegetable oil
- 3 c pumpkin puree, chilled
- 2 eggs
- 1 teaspoon pure vanilla extract
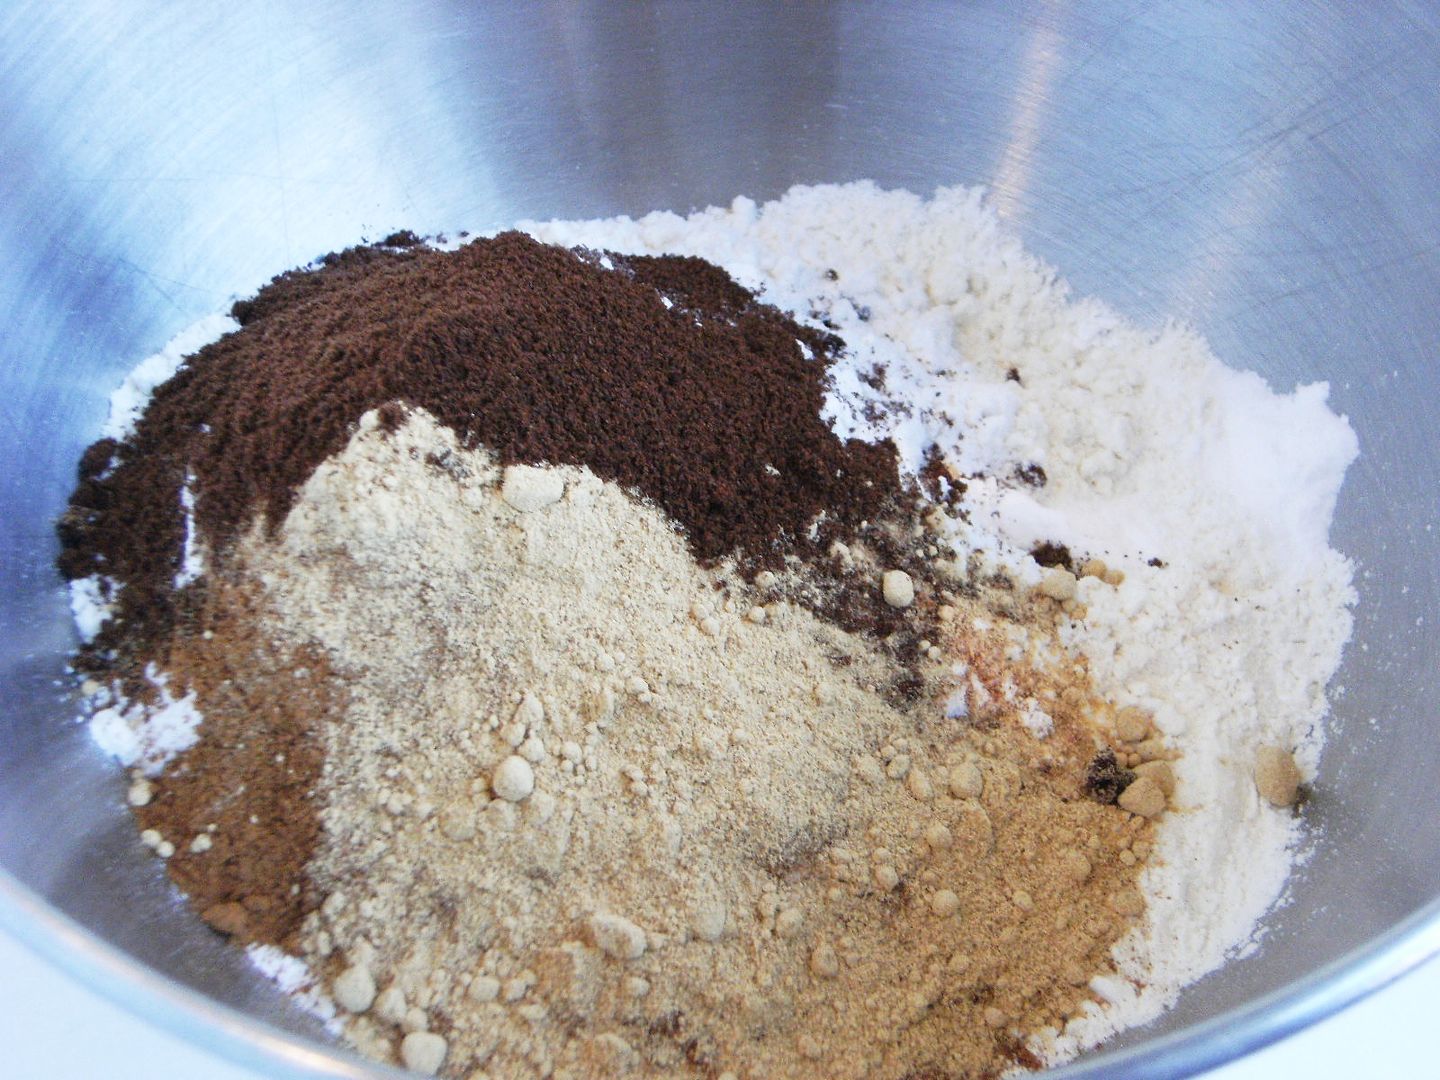
In a large bowl, whisk together flour, salt, baking powder, baking soda, cinnamon, ginger, and cloves; set aside. {The measurements for the spices look like TOO MUCH ...they are correct.}
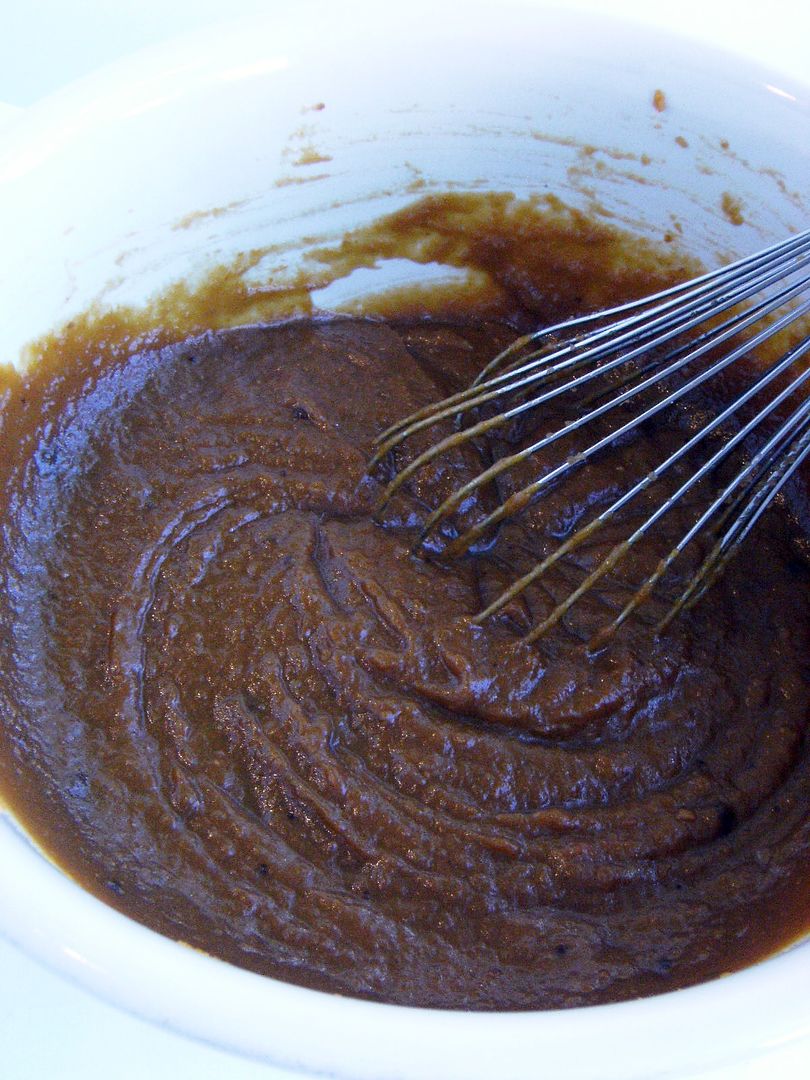
In another large bowl, whisk together brown sugar and oil until well combined. Add the chilled pumpkin puree and whisk until combined. Add eggs and vanilla and whisk until well combined.
Add the flour mixture over pumpkin mixture and whisk until fully incorporated.
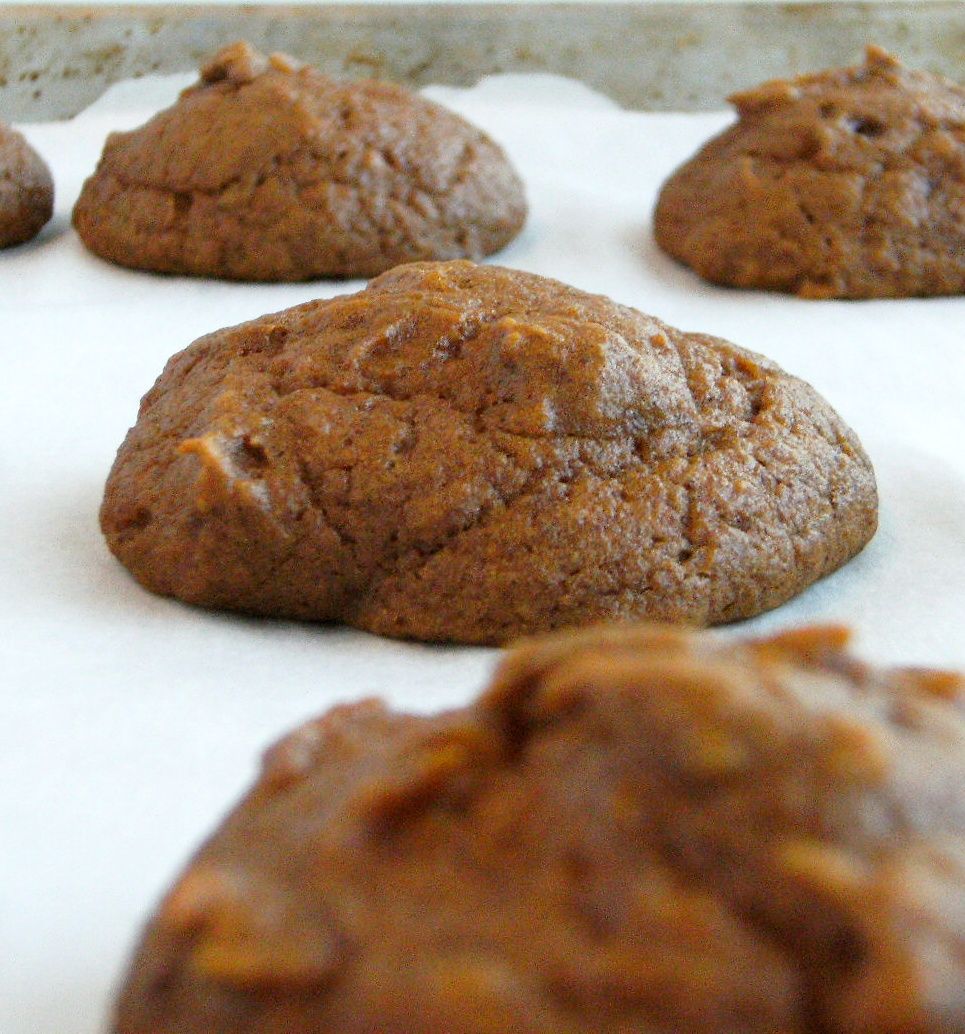
Using a small ice cream scoop with a release mechanism (about 1/8 cup if you don't have one...mine doesn't have a release mechanism), drop heaping tablespoons of dough onto prepared baking sheets, about 1 inch apart. (I got approx. 40 "cookies" to make 20 total pies.)
Transfer to oven and bake until cookies are just starting to crack on top and a toothpick inserted into the center of each cookie comes out clean, about 15 minutes. Let cool completely on pan.
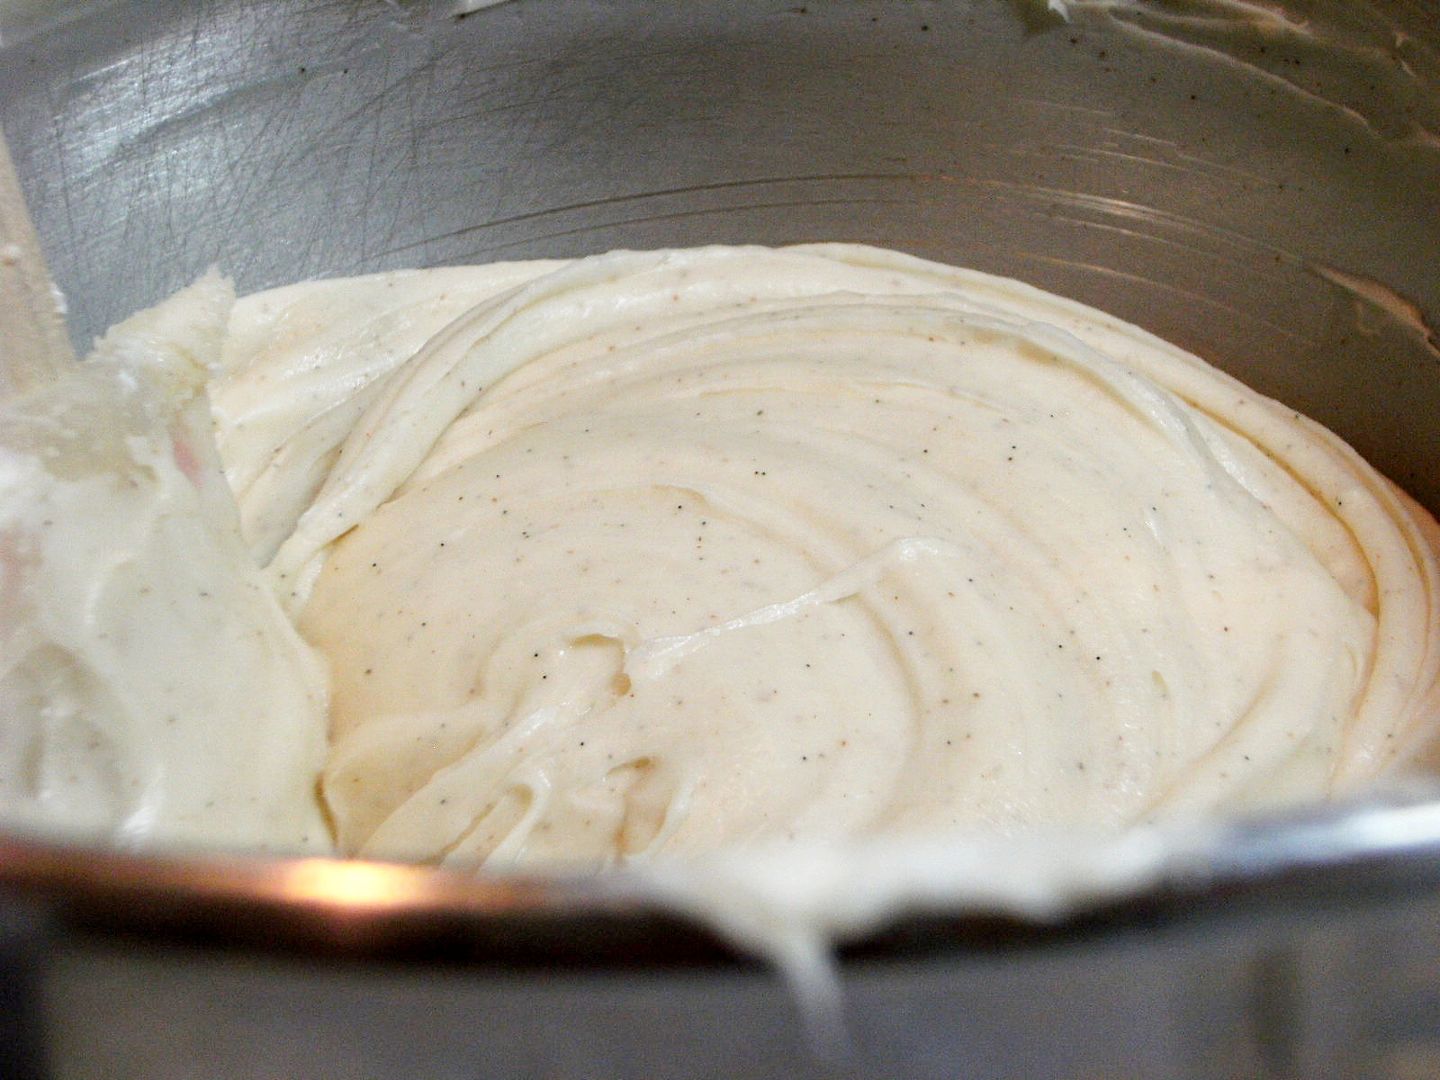
Vanilla Bean Cinnamon Cream Cheese Filling
{doesn't vanilla bean paste make everything better?}
- 3 c powdered sugar
- 1/2 cup (1 stick) unsalted butter, softened
- 8 ounces cream cheese, softened
- 1 teaspoon vanilla bean paste (or vanilla extract)
- 1/4 tsp cinnamon
In the bowl of an electric mixer fitted with the paddle attachment, beat butter until smooth. Add the cream cheese and beat until well combined. Add powdered sugar, vanilla bean paste and cinnamon; beat until smooth.
To assemble the whoopie pies: Line a baking sheet with parchment paper and set aside. Transfer filling to a disposable pastry bag and fit with a large round tip or snip the end.
When the cookies have cooled completely, pipe a large dollop of filling on the flat side of half of the cookies. Sandwich with remaining cookies, pressing down slightly so that the filling spreads to the edge of the cookies. Transfer to prepared baking sheet and cover with plastic wrap.
Refrigerate cookies at least 30 minutes before serving and up to 3 days.
One issue is that they must be refrigerated or they are way too messy to eat. After a day or two, the bottoms do get a little squishy. My friend, Paulie, suggested coating the pies in a glaze...like a Krispy Kreme donut. Any way to incorporate more sugar into a recipe sounds good to me. {Paulie is a very, very smart man!} If someone figures out how to do it, let me know! :)
Next month...Flavor-of-the-Month November theme will be.....
Traditions!
Share a recipe from your mom, dad, grandmother, mother-in-law or even a recipe that you'd like to start as a family tradition.
{As always, anyone is welcome to link to Flavor-of-the-Month; you don't have to ask. Click here to read through all of the previous posts for instructions.}
Ok, ready to link up? I'll keep the linky open through November 2nd, then close it to avoid spammers. Thanks for participating!!!
Thursday, October 29, 2009
Happy Birthday Nicki and an adorable card from The Cutting Cafe'!!!!
 Happy Friday everyone! Today is my oldest daughter's birthday! Happy Birthday Nicki! I love you so much and we're so proud of the beautiful woman you've turned out to be! Hope you have the best birthday ever!! I fell in love with this adorable image of Cinderella by Mo Manning when I first saw her on Pam's blog, and had to immediately purchase her! Nicki is such a hard little worker, and I just thought it would be too cute to make a birthday card for her with Cinderella! I even cased the sentiment from Pam too! Thanks Pam!! :) She's colored with my copic markers. The tag, scalloped circle set, and scalloped frame for the stamped image were all cut with the Cricut Expression using the Storybook cartridge and Tage, Bags, Boxes, and more cartridge. The inside says "may all your birthday dreams and wishes come true".
 This next adorable card is a new mitten shaped card that is available at The Cutting Cafe'. I just think this is the cutest mitten card ever!! And it even comes with an envelope template that is the perfect size for the card! I used Basic Grey Eskimo Kisses which I got from Hallmark Scrapbook, and cut the card with my Pazzle Inspiration. The word circle is also from The Cutting Cafe' from a set called Christmas Circle Set 2. I just cut it out using circle Nestabilities. The snowflake on the inside was cut from the Winter Woodland cartridge.
 That's it for today ladies! Hope you've enjoyed the cards and have a wonderful Friday! HUGS!!
Freebie digi image from Fresh Brewed Designs if you hurry!!!
My friend Heather, owner of Fresh Brewed Designs is giving away a freebie digi image if you hurry before she takes it down! It's an image of Mr Corn and I love it! Be sure you head over there and take advantage of her generosity, and please don't forget to leave her some love on her blog! Her digi images are adorable! Click HERE to get it!
Thanks and hugs!!!
Thanks and hugs!!!
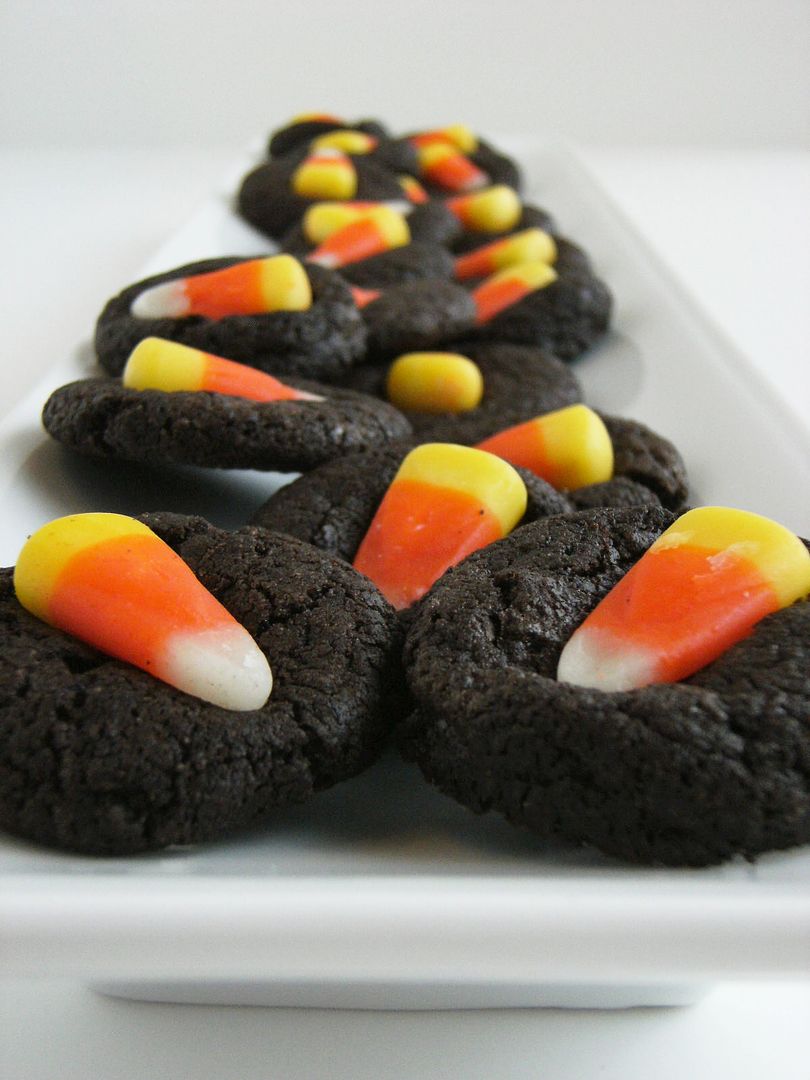
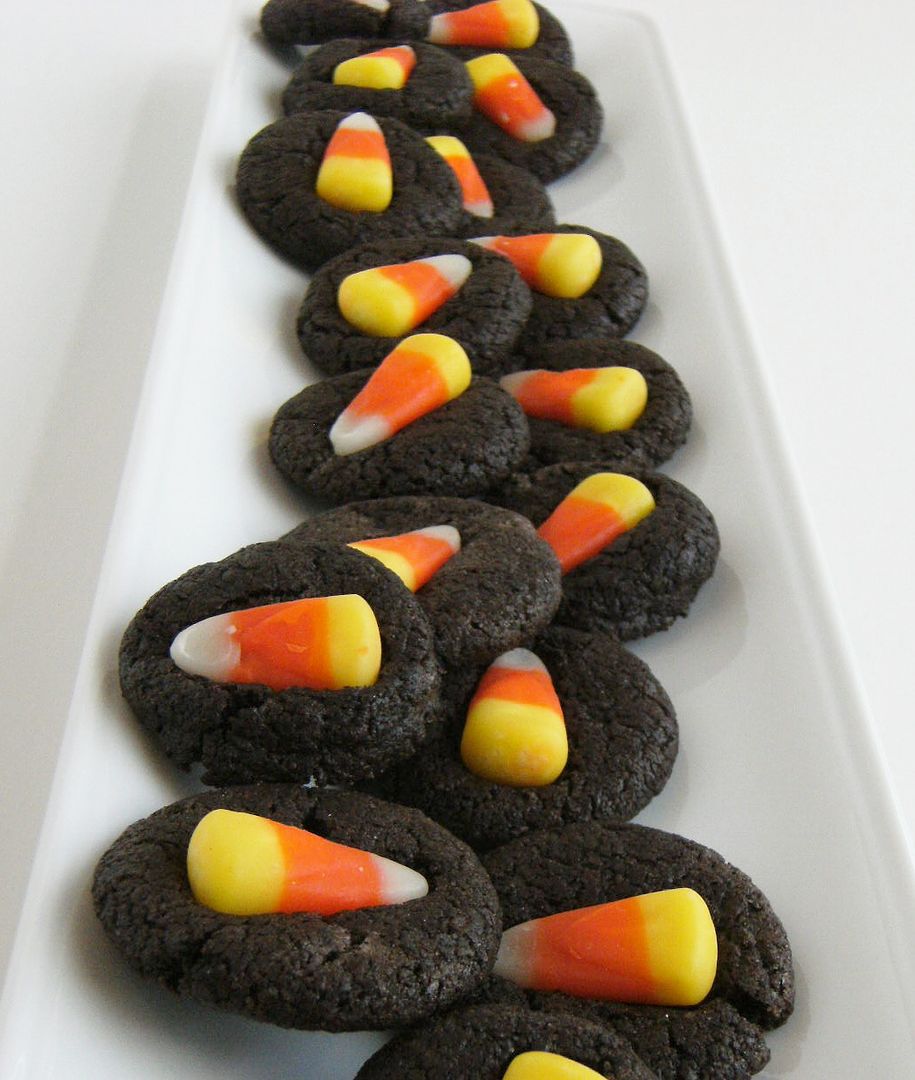
Last-Minute Candy Corn Cookies
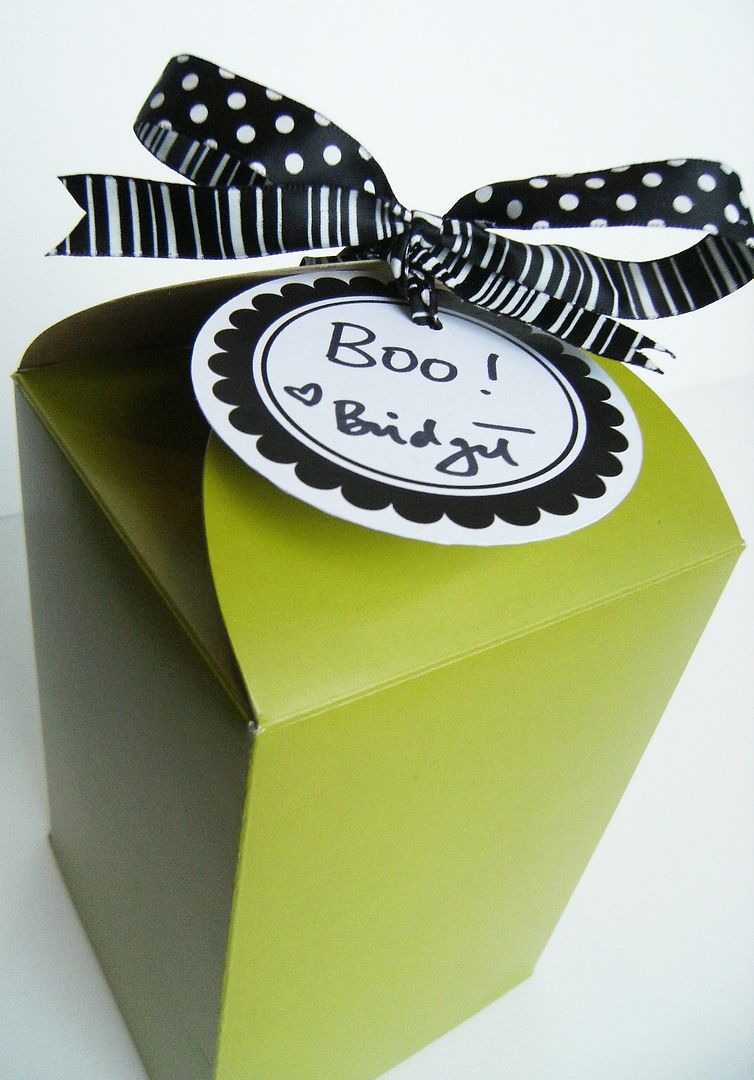
I got Boo'd, y'all!
Does your neighborhood play this game? It's kind of like Secret Santa. Someone leaves a Halloween happy on your porch, you leave one for someone else, and so on.
Well, I was so excited to get Boo'd for the very first time!!! Someone likes me! ;) Yay!
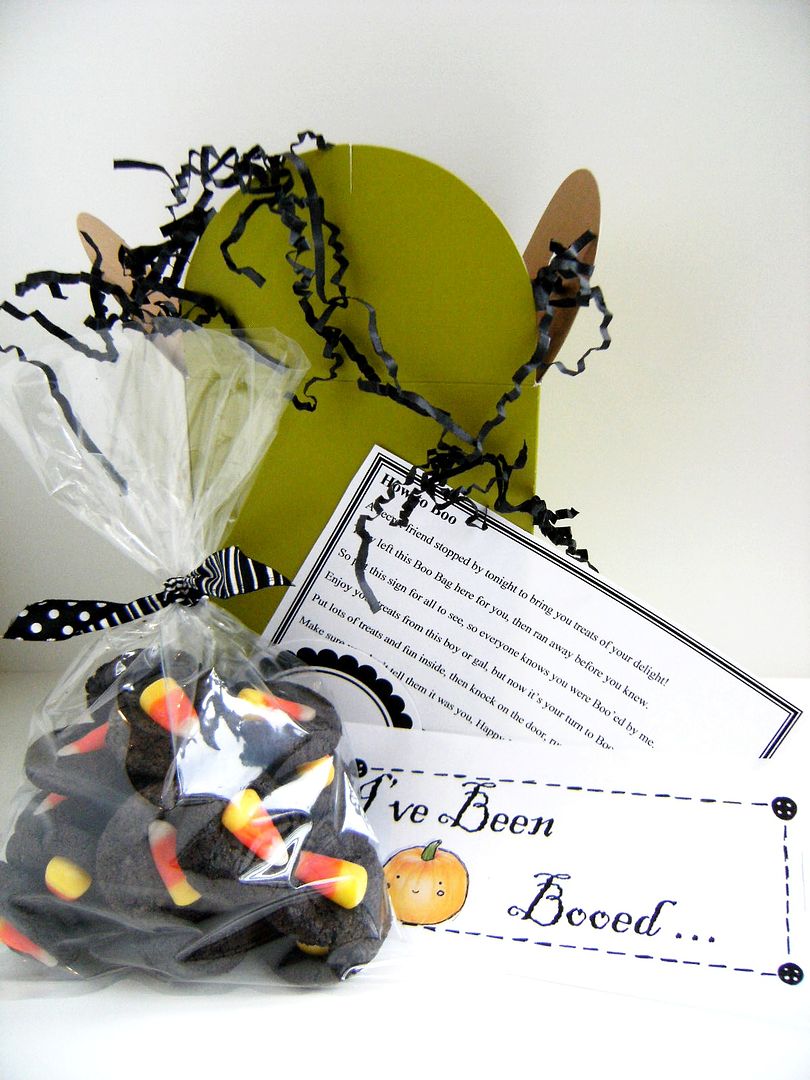
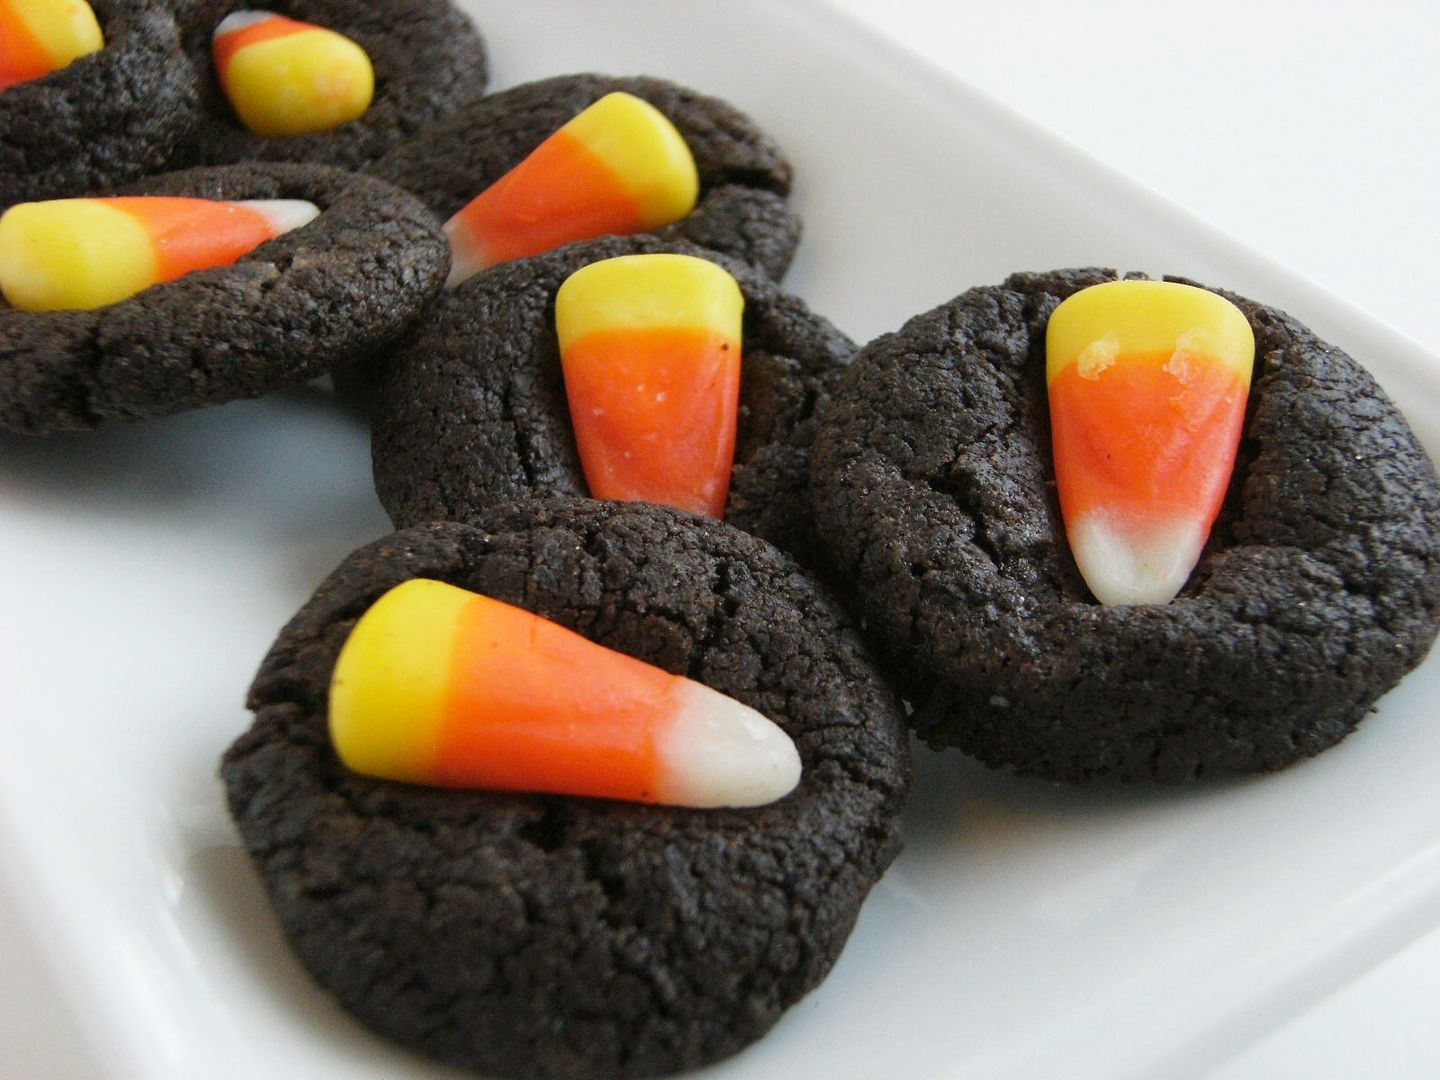
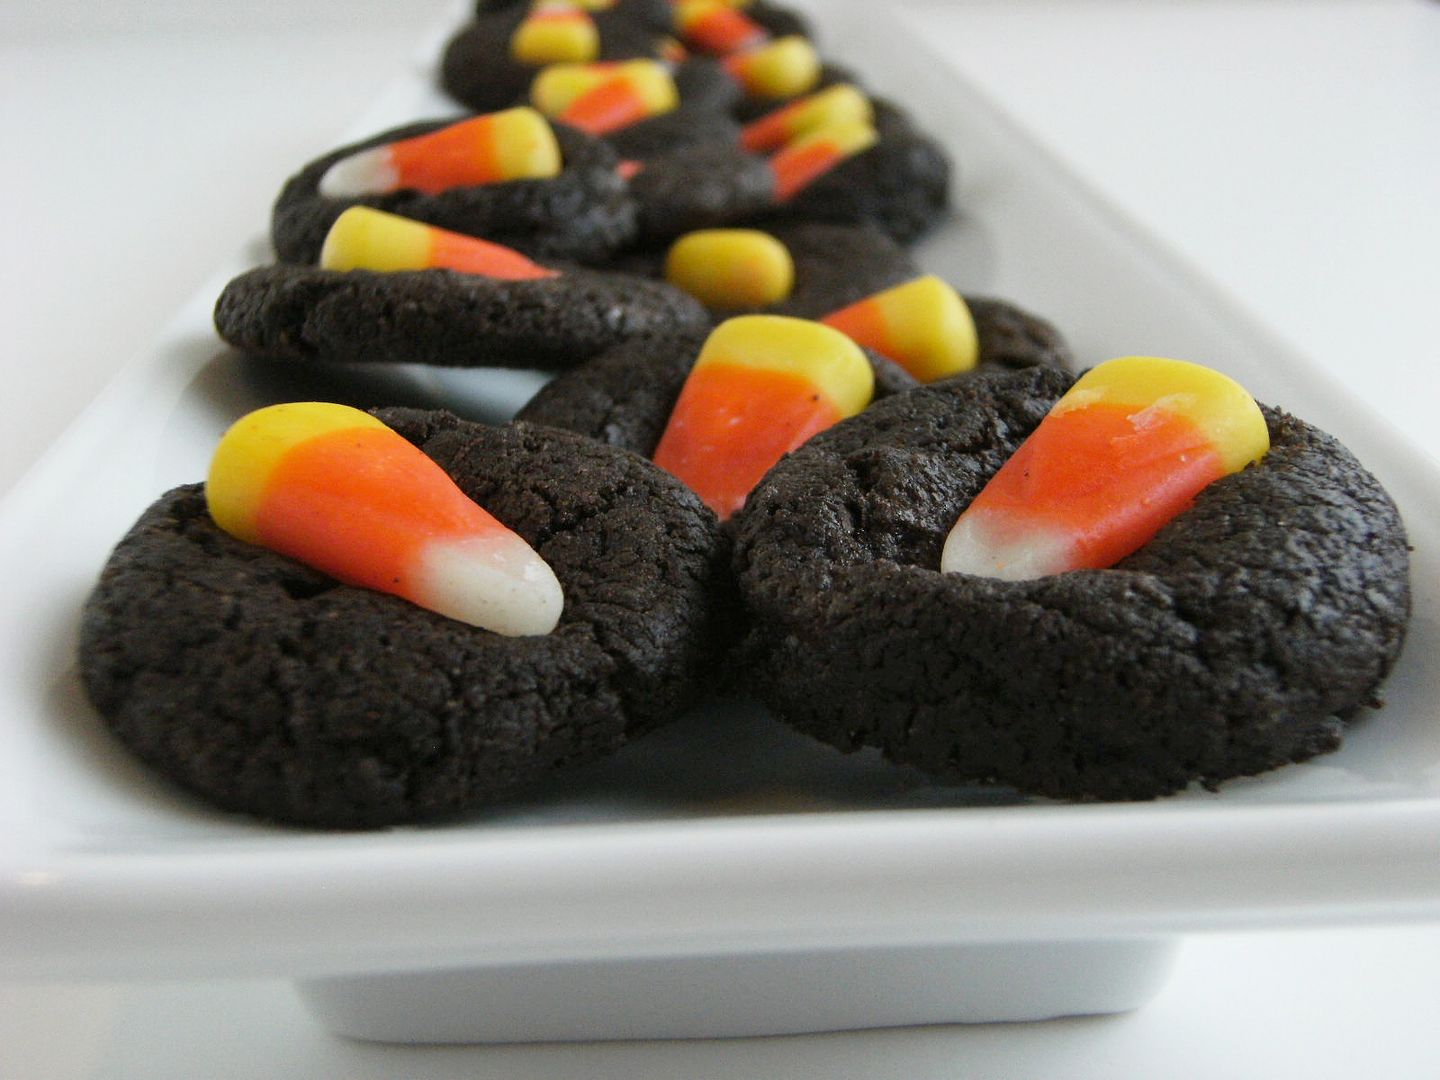
Now, what to do for my BOO? Immediately, I thought of these Chocolate Candy Corn Cookies from Everyday Food (October 2004).
They are really simple and if you have candy corns, you probably have all the other ingredients on hand, too. If you need a quick Halloween treat, these are perfect.
The cookies are addicting! I'm not a huge fan of candy corn (unless mixed with peanuts), but in these cookies, they just add a perfect amount of chewiness. I promise, eat one and you'll go back for another.
Chocolate Candy Corn Cookies
{adapted from Everyday Food}
- 4 tablespoons unsalted butter, very soft
- 1/2 c sugar
- 1 large egg yolk
- 1/4 teaspoon vanilla extract
- 1/4 teaspoon baking powder
- 1/4 teaspoon salt
- 1/2 c all-purpose flour
- 1/4 c dutch-process cocoa (or regular unsweetened cocoa)
- About 36 candy corns
Beat/stir the butter and sugar with a wooden spoon until combined. Stir in the egg yolk, vanilla, baking powder, and salt. Add flour & cocoa, and mix until a dough forms.
Scoop out level teaspoons (a measuring teaspoon, not a cereal teaspoon) of dough, and place balls on baking sheets, 2 inches apart. (It looks like too little dough for each cookie, but it works.) Roll into balls.
Bake, rotating sheets halfway through, until edges are firm and cookies are dry to the touch, 10 to 12 minutes.
{While these are baking, start going through the bag of candy corn to find 36 good ones. You'll want to work quickly when they come out of the oven and it is very frustrating to keep grabbing broken candy corns. Trust me on this.}
Remove from oven; gently press a candy corn into center of each cookie (surface of cookies may crack slightly). The candy corns will stick once the cookies heat them up..they seem like they will fall off at first, don't worry.
Cool on sheets 1 minute; transfer to a rack to cool completely.
Make 32-36 cookies.
Tomorrow (the 31st) is Flavor-of-the-Month...Pumpkin!!!
Related posts:
Boo!
Now that's a RAT.
This is what happens when you share an office with a guy who is from South Africa.
He shows you photos like this.
 *Turns and runs screaming from the interweb*
He shows you photos like this.
 *Turns and runs screaming from the interweb*
Wednesday, October 28, 2009
Creepy Coffin Cookies
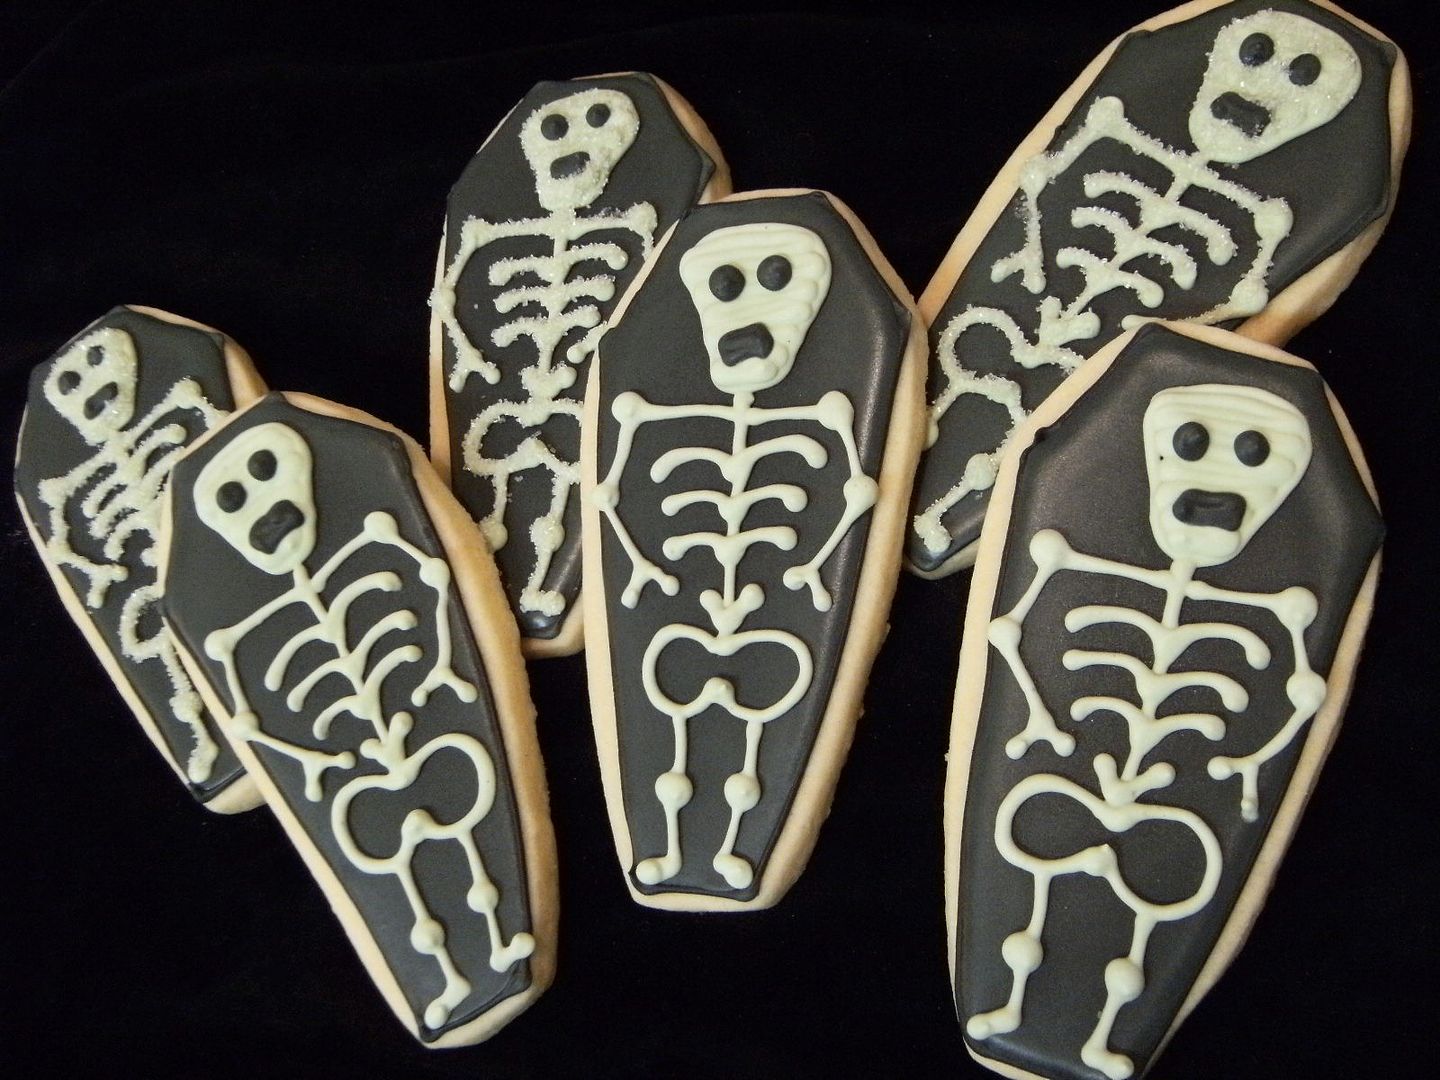
Have you decorated Halloween cookies, yet? Let me show you some of my favorite spooky cookies...coffin cookies complete with skeletons!
These would also be perfect for Dia De Los Muertos! (Thank you for reminding me, AJ!)
This idea comes from Martha Stewart (like all good ideas). :)
The bones are made using Americolor Avocado, just a bit. The resulting color turns out to be a really cool pale ghostly green...like the color of something that is glow-in-the-dark, but not glowing. Anyone know what I mean?
To make them:
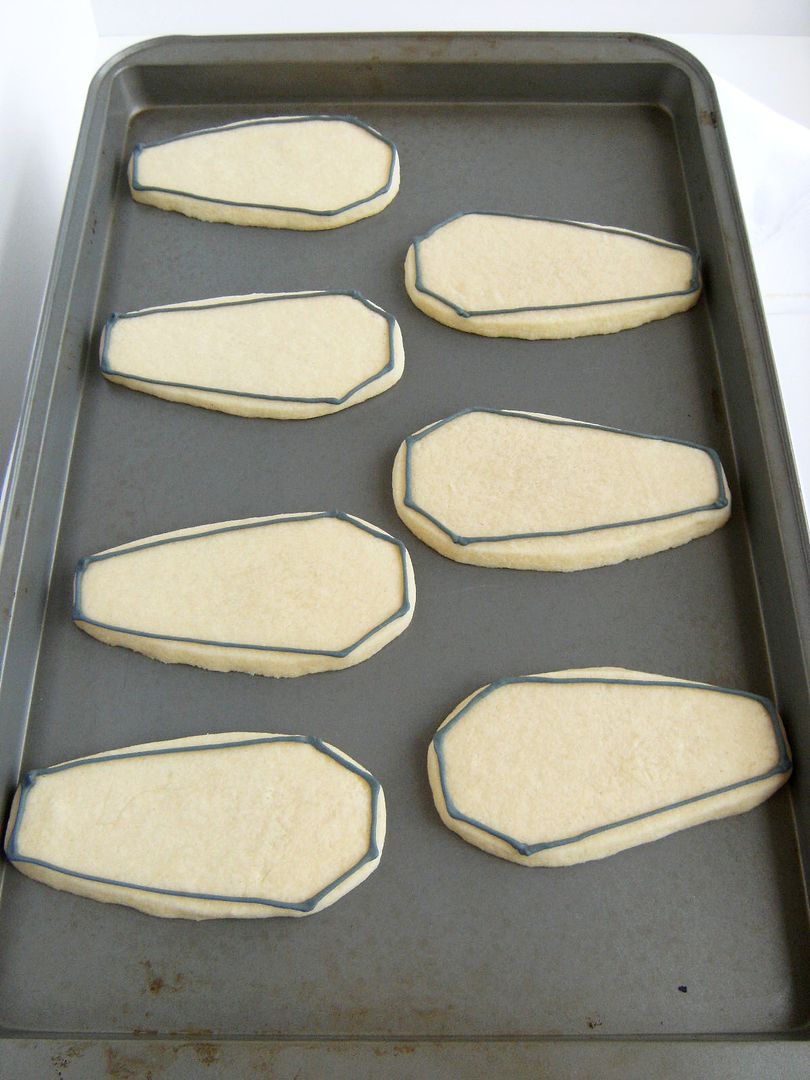
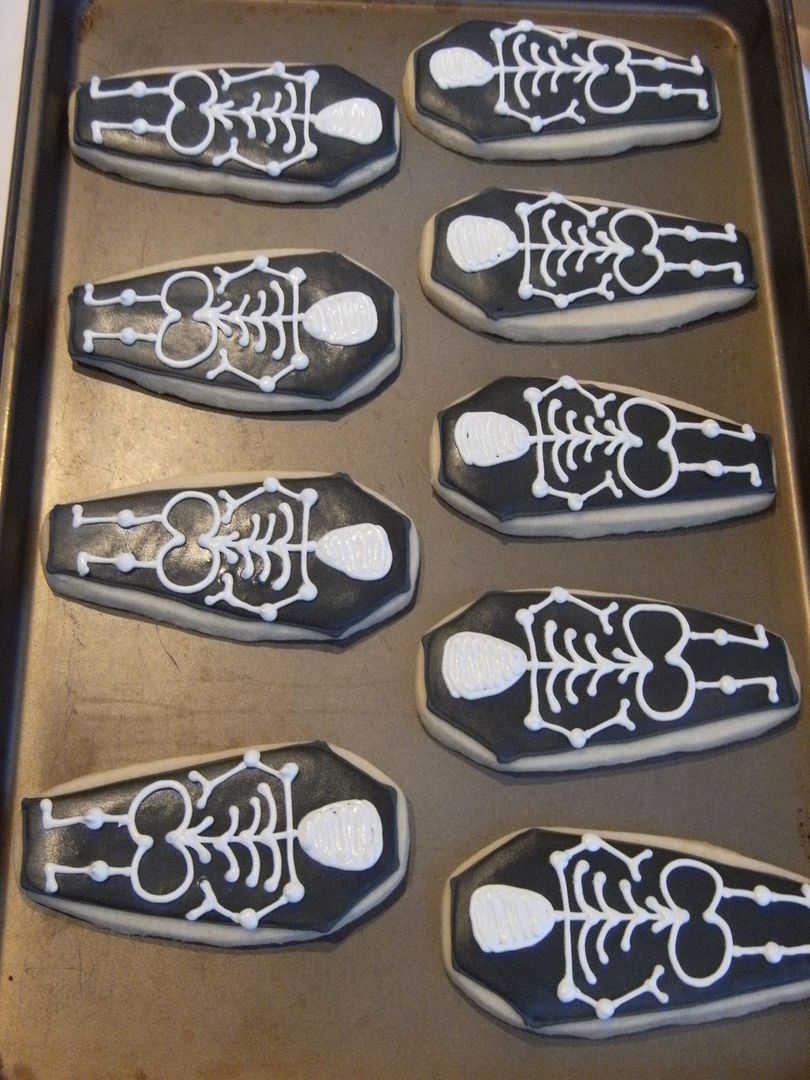
- Pipe a coffin shape in black icing, using a #2 tip. (AmeriColor Super Black)
- Thin black icing with water to a consistency of syrup. Cover with a damp towel and let sit several minutes.
- Run a rubber spatula through the icing to pop air bubbles that have formed on top. Transfer to a squeeze bottle.
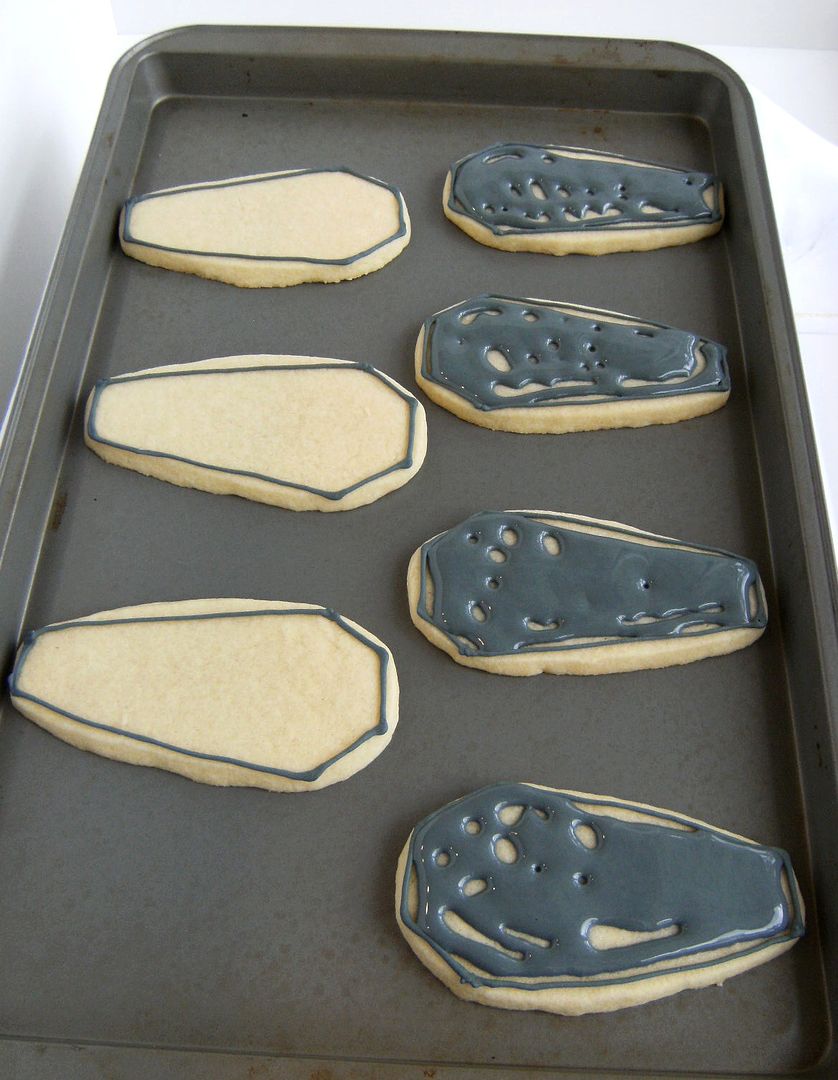
- Fill in the coffins with the thinned black flood icing.
- Let dry at least 1 hour.
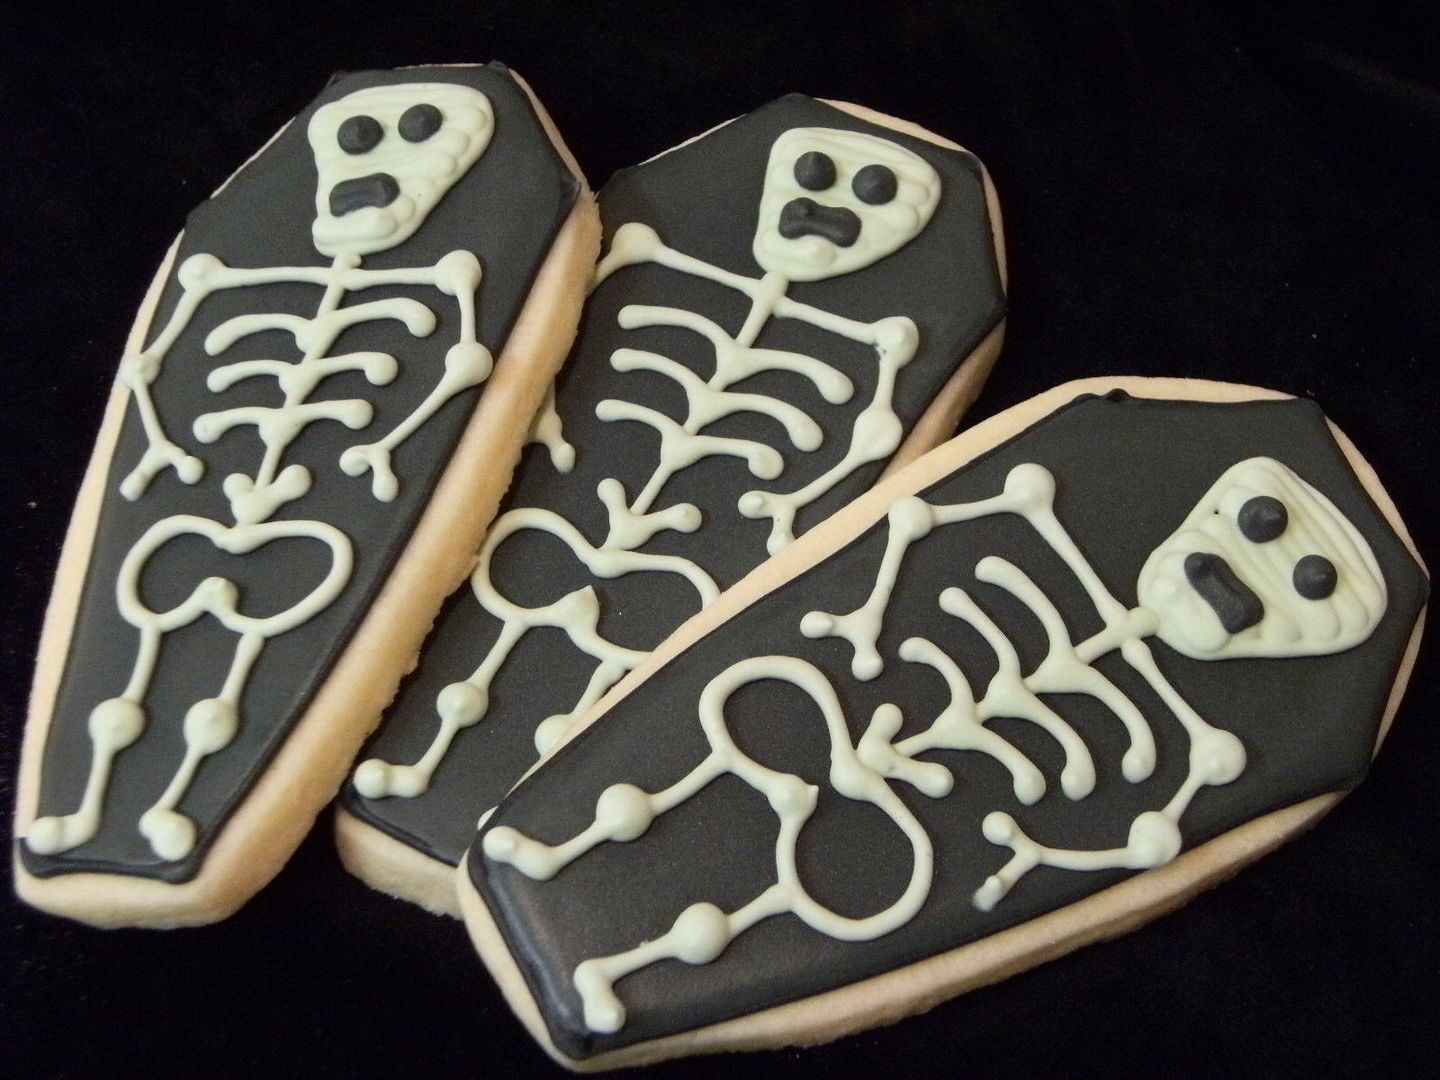
- Using a #2 tip and light green icing, pipe a skeleton shape on the coffins. (AmeriColor Avocado)
- Using the the black piping icing and a #2 tip, make eyes and a mouth on the face.
- Let the cookies dry overnight.
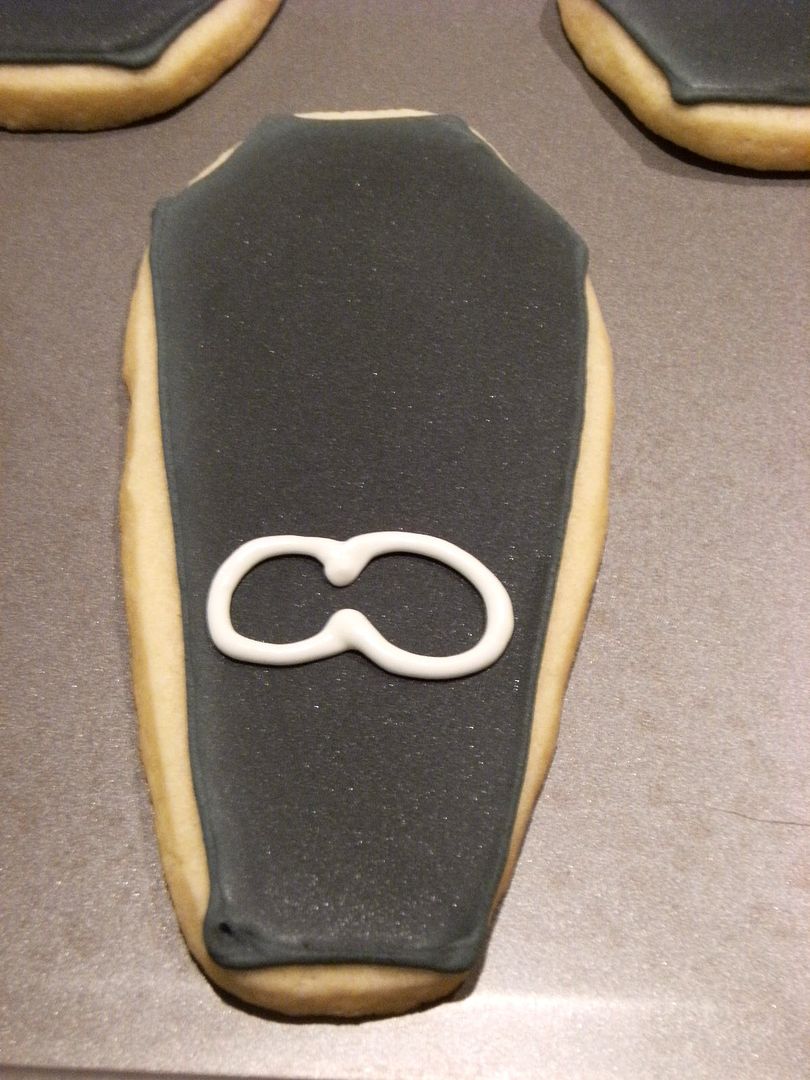
{I start with the hips...I don't know why.}
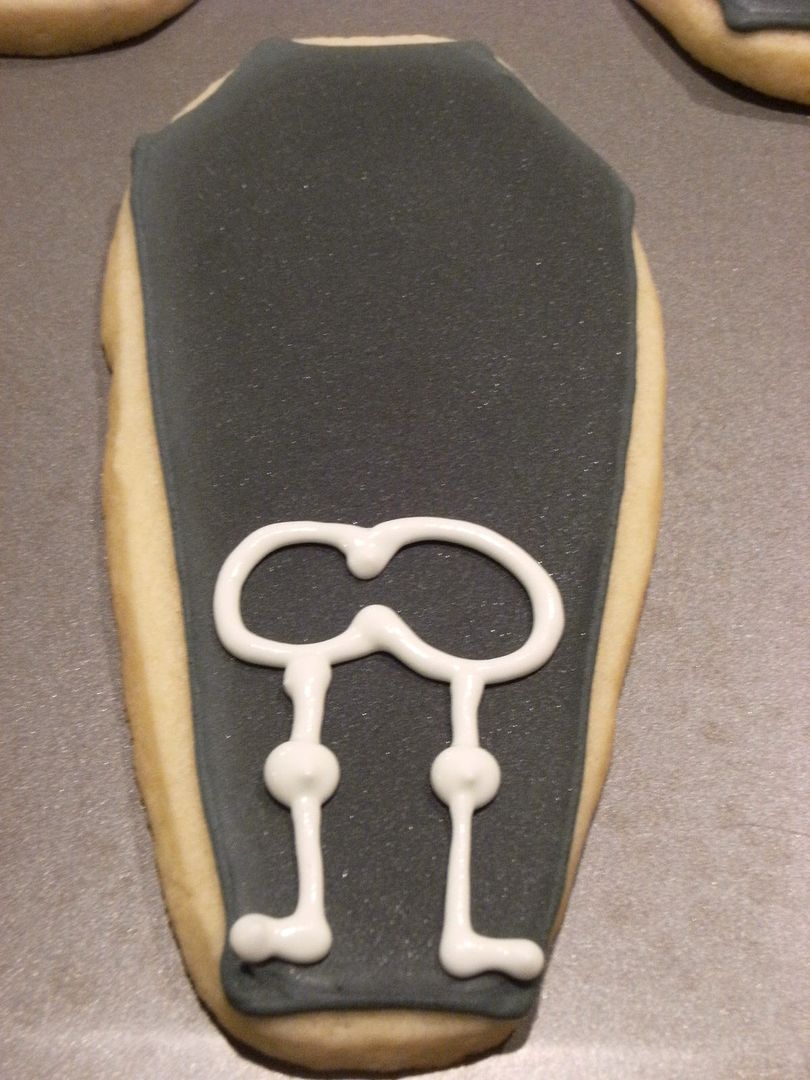
{Next, the legs and feet.}
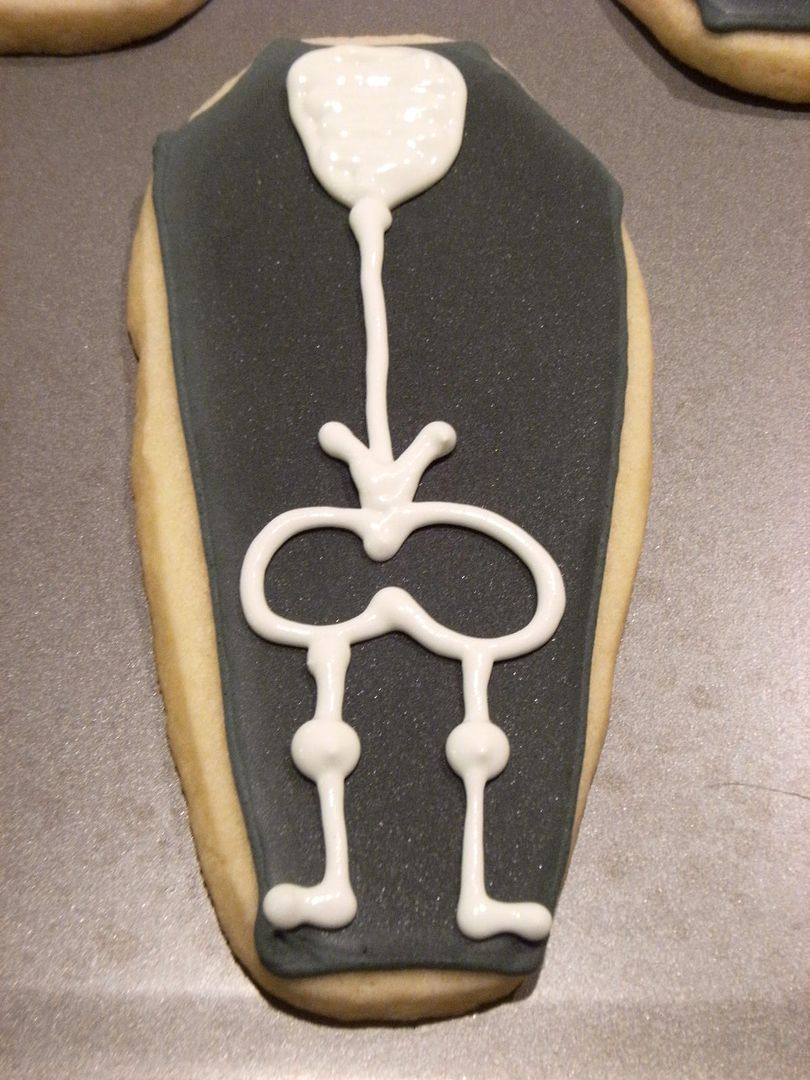
{Head, backbone and tailbone(?)..any doctors in the house?}
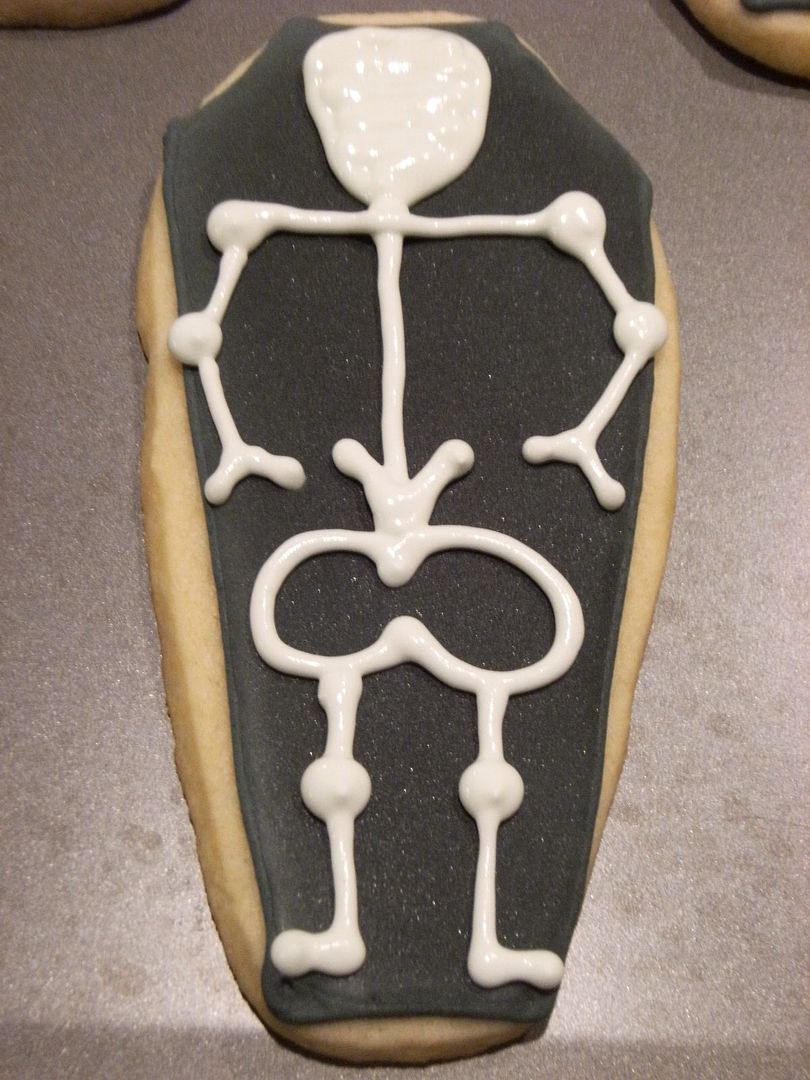
{The neck bone's connected to the shoulder bone, the shoulder bone's connected to the arm bone...}
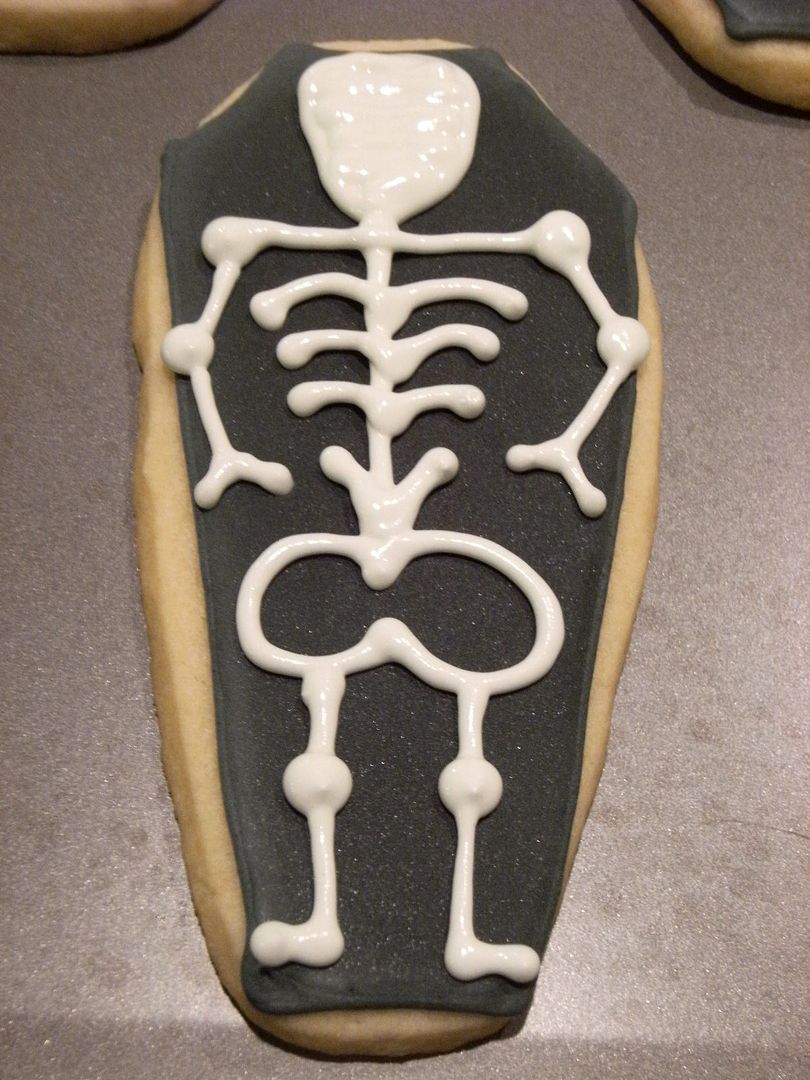
{..and the ribs.}
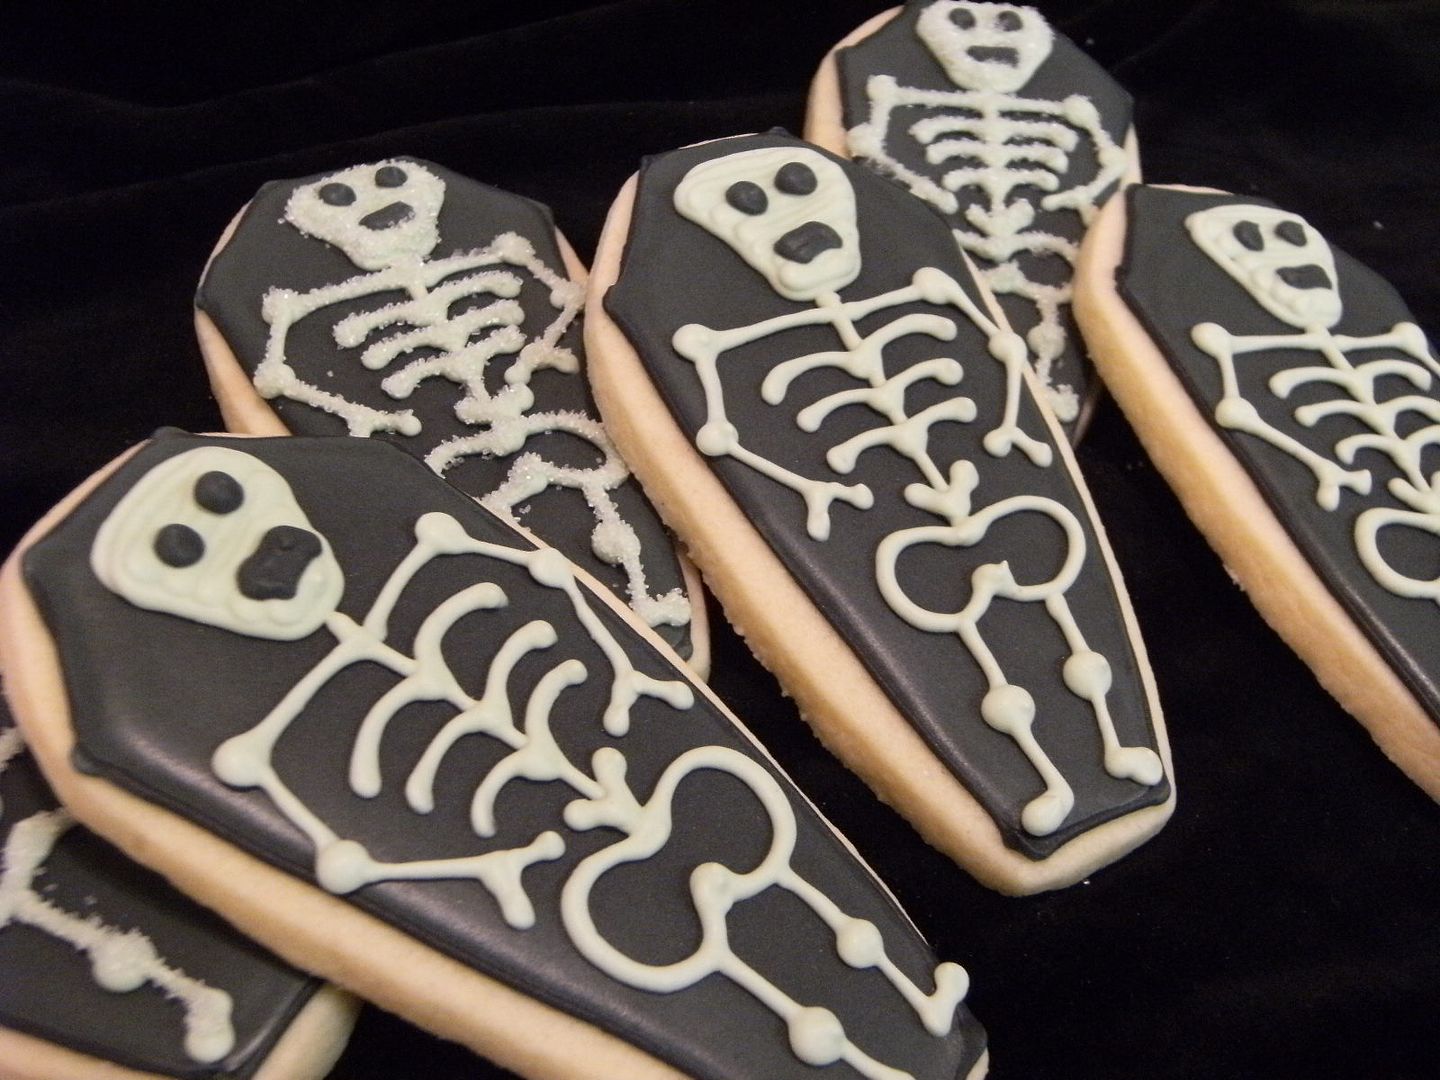
{You can even add a little sanding sugar on the bones if you'd like. I did a few this way last year, but decided I liked them better plain. Martha sparkled hers.}
Related posts:
One last Halloween card to post and GDT for Whimsical Scraps and Bugs
 I'm very pleased to announce that I was invited to play along with two challenges this month over at Whimiscal Scraps and Bugs as a guest design team member. I had a great time and wanted to thank Cindy for inviting me to play along with the two challenges!! The first challenge was a recipe challenge. It was to use three colors (orange, purple, and black), two stars from any Cricut cartridge, and one stamped image. I used #294 Tilda with Spider (LOVE her!!) which I received from Magnolia-licious.
 Most of the paper is Recollections from Michael's, and the cardstock is Bazzil. Tilda is colored with copics on an oval cut with Nestabilities. The stars were cut from the George cartridge and the loopy border punch is by Martha Stewart. Added a few buttons to balance out the design and this one was finished! Thanks a lot for stopping by to see me today and hope to see you back again soon! HUGS!
 Please don't make me be a duckling slayer.
 Dear Mrs Duck,
While I am sure you are very proud of your new ducklings and you can't wait to show them off to the world and around the neighbourhood, can I please request just one thing?
Would you please be able to refrain from walking them across the road? It's just if I'm driving down the road, and I suddenly see you all crossing I can't promise I will hit the brakes in order to avoid taking out your family.
I know this sounds all very selfish but it's like this - if there's a car up my derriere and, without warning, I hit the brakes chances are said car could crash into the boot of my car and before you can say 'Peter Rabbit for president' I will be wearing my internal organs on the outside.
Sorry to be a killjoy. Maybe just stick to paths and water ways.
Just a thought.
Happy waddling.
kate
Tuesday, October 27, 2009
Icing Prep. . . .Works For Me Wednesday
 My fear (one of them) when making cookies is that I'll forget to make icing in a color I need. I'll be halfway into decorating, only to realize...PINK, I NEEDED PINK!
To prevent that...here's the system that works for me...

First, I make a list of the cookies I'm making and what colors I'll need for each. Each color is marked "O" for outline or "F" for fill. (This night I was making 24 mustaches, 8 spiderwebs and 22 coffins.)

{If it's a new design, I'll sketch out the cookie first, labeling each area with a color. Like this.}


Now, I simply cut the list and place each strip in a bowl. (Big bowls for large amounts of icing, smaller for smaller...I guess that kinda goes without saying.) :)

Next, I make my royal icing. There...perfect.


I divide it first, covering each bowl with plastic wrap, pressing down into the icing to prevent drying and cracking. (Here, I knew I needed lots of black for outlining and filling. I divided all the icing for the other colors into bowls, then mixed the black into the remaining icing. This I put in two separate containers because I knew I needed a lot. Since I tinted it all in the big bowl, it was all the same shade. Does that make sense?)

Finally, the tinting is finished (I use AmeriColor Food Coloring which is available in bakery supply stores, online and brick & mortar, and also in my Amazon shop.)
From here, the icing is ready to use or refrigerate for later.
AND, I haven't forgotten a color! Yay!
Check out all of the other WFMW tips at We Are THAT Family. Also, if you haven't taken the Bake at 350 survey, click here!
Related posts:
Further to yesterday's post.
Regular readers of this blog will know that of the four seasons, there are two that I would happily live without (yes I am looking at you Winter and Autumn). However the same doesn't not apply to seasonal food.
I love seasonal food and all it signals. 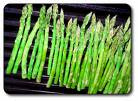
Asparagus means summer is round the corner, strawberries mean Christmas is round the corner, oyster season means I'll be going over to the family-of-four-boys-six-and-under and making a pig of myself with oysters, whitebait season means I'm going to find me someone to cook me some whitebait.
I always think of seasonal food as a treat. I don't think I would feel the same about these foods if I could wrap my laughing gear around them twelve months a year.
Same with dining out. With work I tend to travel a reasonable amount which means eating out. I always find it's fun to begin with, but even after two days of buying breakfast, lunch and dinner from a menu the treat of eating out starts to become a drag. Not another freaking menu. Too many treats.
Now, I would like to apply this theory to Christmas. Don't get me wrong, I love Christmas.
But in December.
If you start to torture me with Christmas in October, I will really resent Christmas by the time it eventually rocks around. And you will most probably find 'fucking' not terribly far from 'Christmas' in sentences that come out of my mouth.
And when I saw that full blown Christmas tree yesterday, I was not filled with the spirit of Christmas, no, I wanted to slam my head in the door.
Retailers, if you're listening, PLEASE DON'T RUIN CHRISTMAS FOR THE REST OF US BY GIVING US BLANKET COVERAGE FROM OCTOBER.
Please don't make us hate Christmas.
Cause I'd like to stay fond of it, if that's okay.
I Fly Like Paper
I've talked about wanting to learn how to fly an airplane, but there's actually one type of plane I can already glide across the sky-- the kind with wings made of paper. While folding a paper plane takes some skill, sending a well-made one soaring across a room requires little or no training. The flights may not always be long nor the landings always pretty, but watching the thin paper momentarily suspended in air always seems just a bit magical.


Subscribe to:
Posts (Atom)
